
Table of Contents
- Why Fence Panels Rattle in the Wind
- How to Stop Fence Panels Rattling in Concrete Posts
- How to Fix a Loose Fence Post
- Securing Your Panels: Step-by-Step Installation
- Common Mistakes That Make Rattling Worse
- Frequently Asked Questions
Last Updated: 7 October 2026
Why Fence Panels Rattle in the Wind
Fence panels rattle because they're not rigidly fixed to the posts. Wind pushes against the panel, and if there's any gap or loose connection, the panel moves back and forth. This movement creates noise and, over time, damages both the panel and the post.
The problem gets worse in exposed gardens. Wind funnels between buildings or across open spaces, hitting your fence with real force. Loose fixings make the noise louder and the wear faster.
Concrete posts are stronger than timber, but they only work if you install them properly. A poorly secured panel will rattle on concrete just as much as on wood. The fix isn't to buy better posts, it's to secure your panels properly to the ones you have.
How to Stop Fence Panels Rattling in Concrete Posts
Stop fence panels rattling in concrete posts by using the right brackets, anti-rattle strips, and clips. These three methods work together to eliminate movement and noise.
Fit Fence Panel Brackets Securely
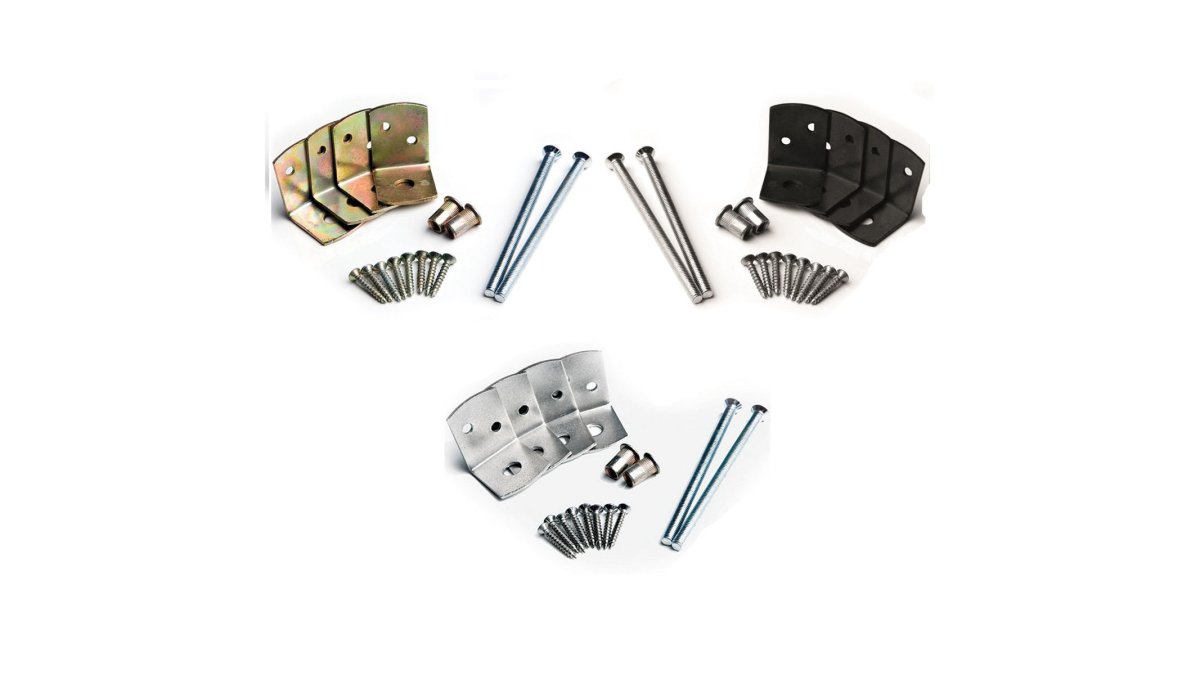
Fence panel brackets are the foundation of a silent fence. They hold the panel tight against the post and stop side-to-side movement.
Quality matters here. Stainless steel brackets last longer than galvanised ones, especially in wet climates. Anthracite-coated brackets blend with modern posts and look cleaner.
Install brackets on both sides of the post, left and right. This prevents the panel from twisting. Bolts should span the full thickness of the post, not just sit on the surface. When you tighten the bolts, the bracket pulls the panel firmly against the post.
Use a TX or PZ screw head, depending on your bracket type. Tighten evenly, don't over-torque one bolt and leave another loose. Uneven pressure creates gaps where the panel can move.
At Concrete Fence Posts, our fence panel brackets come in sets of four, designed to fit both 10x10cm and 8.5x8.5cm posts. This ensures you have the right size for your installation.
Use Fence Panel Anti-Rattle Strips
Anti-rattle strips fill the gap between the panel and the post. Without them, wind pushes through the gap and makes the panel vibrate.
Strips are usually rubber or foam. They compress slightly when the panel is installed, creating a seal. This stops the panel from moving freely and absorbs vibration energy.
Install strips on the back of the panel, where it contacts the post. Run them along the full height of the panel on both sides. Strips cost little but make a real difference to noise.
Weatherproofing is a bonus. Strips also block water from sitting between the panel and post, which reduces rot and corrosion.
Install Fence Panel Clips for Extra Support
Clips add a second layer of security. They're smaller than brackets and work alongside them.
Clips grip the panel edges and hold them tight. They stop the panel from lifting or dropping, which reduces movement in all directions.
Install clips at the top and bottom of the panel, midway between the posts. Space them evenly. This creates multiple anchor points and spreads the load.
Clips work best with brackets. Brackets do the heavy lifting, and clips fine-tune the fit. Together, they eliminate rattle almost completely.
How to Fix a Loose Fence Post
A loose post is often the real culprit. Even perfect brackets won't help if the post moves in the ground.
Check your post first. Push hard on the top. If it shifts, the post is loose. This usually means the concrete base has cracked or the post wasn't set deep enough.
Dig around the base of the post and inspect the concrete. Look for cracks or soft spots. If the concrete is crumbling, you need to reset the post.
Remove the panel and brackets. Dig out the old concrete. Set the post again with fresh concrete mix, going at least 60cm deep. Use quick-dry postcrete for speed, it sets in about 15 minutes, so you can reinstall the panel the same day.

If the post is solid but still moves slightly, tighten the brackets harder. Sometimes the issue is loose fixings, not a loose post.
Securing Your Panels: Step-by-Step Installation
What You'll Need Before Starting
Gather these items before you start:
- Concrete fence posts (10x10cm or 8.5x8.5cm)
- Fence panel brackets (stainless steel or galvanised, matching your post size)
- Anti-rattle strips
- Fence panel clips
- Bolts and washers (usually supplied with brackets)
- A spanner or socket set
- A spirit level
- Quick-dry postcrete (if setting new posts)
- Water (approximately 3 litres per 25kg bag of postcrete)
- A mixing container or bucket
Installation Steps
Step 1: Set your posts correctly. Posts must be vertical and set at least 60cm deep. Use quick-dry postcrete to anchor them. Allow 15 minutes for initial set before moving to the next step. Full curing takes longer, but you can install panels once the postcrete stops shifting.

Step 2: Position the first panel. Lift the panel carefully and rest it on the posts. Use a spirit level to check it's straight. Adjust the panel height so it sits evenly on both posts.
Step 3: Install the first bracket. Place a bracket on the left side of the first post. Align it with the panel's edge. Insert bolts through the bracket and post. Tighten by hand first, then use a spanner. Don't over-tighten yet.
Step 4: Install the second bracket. Place a bracket on the right side of the same post. Insert and hand-tighten bolts. This bracket should pull the panel firmly against the post.
Step 5: Fit anti-rattle strips. Cut strips to the panel height. Peel the backing and stick them to the back of the panel where it meets the post. Run strips along both sides of the panel.
Step 6: Tighten all bolts evenly. Go back to the first bracket and tighten each bolt in a cross pattern. Move to the second bracket and repeat. Even pressure prevents gaps.
Step 7: Install clips. Attach clips at the top and bottom of the panel, midway between posts. Clips should grip the panel edges firmly but not deform them.
Step 8: Check for movement. Push the panel firmly in all directions. It should not move. If it shifts, tighten brackets and clips further.
Step 9: Repeat for the next panel. Move to the next post and repeat steps 2-8. Each panel should install the same way.
Common Mistakes That Make Rattling Worse
Using cheap brackets. Budget brackets bend under wind load. They look fine at first, but within weeks they flex and your panel rattles again.
Forgetting anti-rattle strips. Strips are cheap and easy to install. Skipping them leaves a gap where wind pushes through. You lose 80% of the noise reduction benefit.
Tightening bolts unevenly. If you tighten one bolt fully before moving to the next, the panel pulls to one side. This creates gaps on the opposite side. Always use a cross pattern and tighten gradually.
Setting posts too shallow. Posts set less than 60cm deep shift in the ground, especially in winter frost or heavy rain. A shifting post makes every panel rattle, no matter how good your brackets are. Dig deep and use proper postcrete.
Installing only one bracket per post. A single bracket lets the panel twist. Wind pushes on one corner and the panel rotates slightly. Use brackets on both sides of every post.
Mixing old and new brackets. Old brackets may not fit new posts exactly. Buy a matching set for the whole fence. Mismatched brackets create inconsistent pressure and gaps.
A rattling fence is fixable. The noise isn't a sign your posts are weak, it's a sign your fixings are loose. Concrete Fence Posts supplies the brackets, clips, and anti-rattle strips that stop the rattle. Our lightweight concrete fence posts are designed to work with standard brackets and clips. We also stock quick-dry postcrete to set them properly. Tighten your brackets, add strips, and your fence will be silent. Get started with a proper installation and enjoy a fence that lasts.
Frequently Asked Questions
Why do fence panels rattle in the wind?
Fence panels rattle when there is movement between the panel and the concrete post. This occurs when brackets are not tight enough, panels sit loosely in the post slots, or the post itself shifts slightly in the ground. Wind pressure pushes the panel against the post repeatedly, creating the rattling noise. Concrete posts are rigid and won't flex, so any gap between panel and post will amplify vibration and sound.
What can I put between a fence panel and a concrete post to stop rattling?
Fence panel anti-rattle strips are specifically designed for this purpose. These rubber or foam strips fit into the gap between the panel and post, absorbing vibration and preventing movement. Alternatively, fence panel clips grip the panel edges tightly to the post. Both methods work by eliminating the space that allows the panel to move and rattle when wind pressure builds up.
Can fence panel clips alone stop my fence from rattling?
Fence panel clips can significantly reduce rattling by holding the panel edges firmly against the post. However, for the best result, combine clips with anti-rattle strips and secure brackets. Using all three methods together prevents movement at every contact point: the bottom (brackets), the sides (clips), and the gaps (strips). A single method may reduce noise but won't eliminate it entirely if the post itself is loose.
How do I know if my fence post is loose and needs stabilising?
Push the top of the post firmly with your hand. If it moves noticeably or sways, the post is loose. Check the base where the post enters the ground; if concrete around the post is cracked or missing, water has entered and the post may be unstable. A loose post will cause panels to rattle even with brackets and clips fitted. Stabilise the post by adding fresh postcrete around the base or replacing the concrete foundation entirely if damage is severe.