
Table of Contents
- What You'll Need Before Installing Concrete Posts
- Determining Concrete Fence Post Depth for Your Garden
- Concrete Fence Post Spacing: Getting the Measurement Right
- Step-by-Step Installation Process
- How Long for Post-Setting Concrete to Cure
- Common Installation Mistakes to Avoid
- Safety Tips for Installing Concrete Posts
- Frequently Asked Questions
Last Updated: October 5, 2026
What You'll Need Before Installing Concrete Posts
Installing concrete posts in your garden requires careful preparation. Gather the right tools and materials before you start digging.
Tools you'll need:
- Spade or shovel for digging
- Spirit level to check posts are vertical
- Tape measure for spacing and depth
- Concrete mixing bucket or mixer
- Mixing paddle or spade for concrete
- Wheelbarrow for moving soil and materials
- Rubber gloves and safety glasses
- Hammer for tapping posts into place
Materials required:
- Concrete posts in your chosen size and style
- Quick Dry Postcrete bags for anchoring posts, typically two bags per post, though this varies by project
- Water for mixing concrete
- Gravel or hardcore for the post hole base (optional but recommended)
At Concrete Fence Posts, we recommend checking your post dimensions against your fence panels before purchasing. Our Jessel Concrete Fence Post Range in 10x10x280cm suits standard H180 x W180cm panels, whilst our Sheil range at 8.5x8.5cm offers a lighter alternative that's easier to handle.

Having everything on hand before you start prevents delays.
Determining Concrete Fence Post Depth for Your Garden
The depth of your concrete fence post installation determines stability and longevity. Posts must go deep enough to resist wind pressure and ground movement.
Standard concrete fence post depth is typically one-third of the post's total height buried underground. For a 280cm post supporting a 180cm fence panel, you'll dig approximately 90cm deep.
This depth works for most residential gardens with standard soil conditions. However, adjust based on your specific situation:
- Sandy or loose soil: Go 10-15cm deeper for extra grip
- Clay or compacted soil: Standard depth usually suffices
- Windy exposed gardens: Increase depth by 10-15cm
- Sloped terrain: Dig deeper on the downslope side
The concrete fence post depth rule isn't arbitrary. Wind pressure increases with height, and shallow posts flex and loosen over time. Frost heave in winter can lift shallow posts, creating gaps between panels.
Check local ground conditions. If you hit rock or water within your planned depth, you may need to adjust your post spacing or use shorter posts. Concrete posts won't rot like timber, but they still need proper support.
Concrete Fence Post Spacing: Getting the Measurement Right
Correct spacing between concrete posts prevents panel sagging and maintains your fence's appearance. Standard spacing depends on your fence panel width.
Most residential fence panels are 180cm wide, so space posts 180cm apart from centre to centre. This measurement is crucial, it's the distance between the middle of one post and the middle of the next.
Measure twice before digging the first hole. A small error compounds across multiple posts. If your garden isn't a perfect rectangle, you'll need to adjust the final spacing slightly to fit your boundary.
Concrete fence post spacing tips:
- Measure from a fixed point (corner of house, garden boundary)
- Mark each post position with a stake or spray paint
- Check measurements from both directions to ensure accuracy
- Account for corner posts, these may sit at different intervals
- For longer runs, check the middle measurements too
Uneven spacing looks unprofessional and can cause panels to fit poorly. Posts that are too close together waste materials. Posts too far apart allow panels to sag between supports.
Consider corner posts separately. These often sit at 90-degree angles, so your spacing pattern may need adjustment at boundaries. Plan your layout on paper first if you have multiple corners.
Step-by-Step Installation Process
Installing concrete posts follows a logical sequence. Rush any step and you'll compromise the entire fence.
Preparing the Ground and Marking Positions
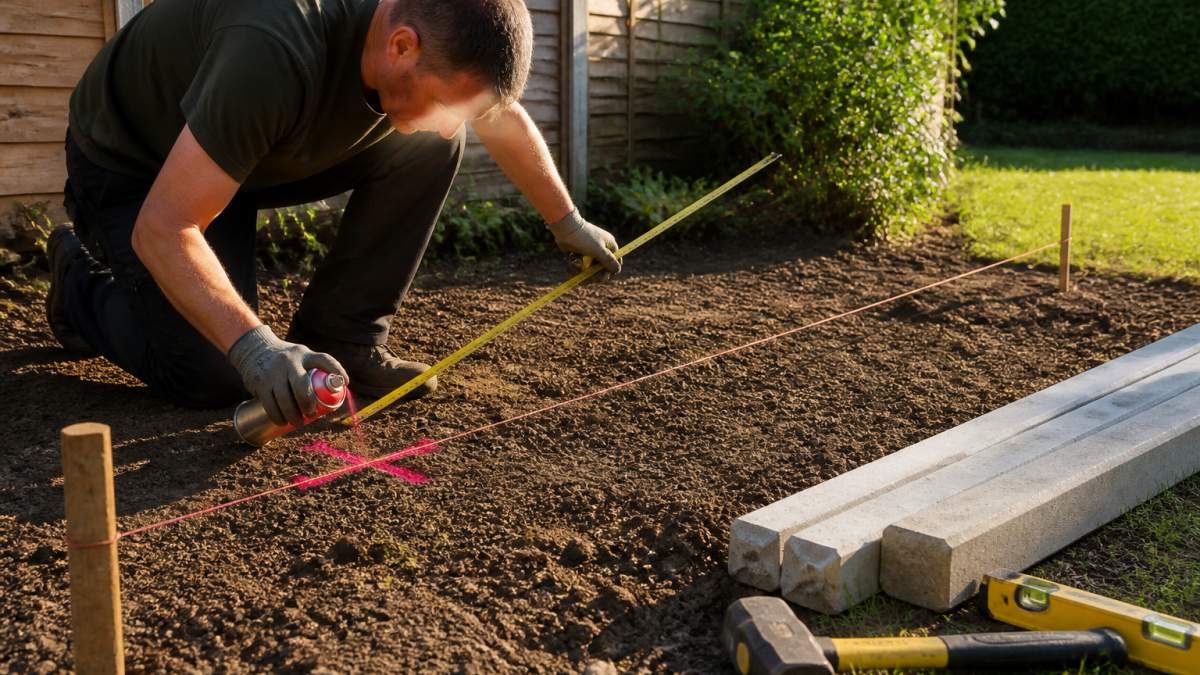
Start by marking every post location accurately. Use a tape measure and string line to ensure posts are perfectly aligned.
Drive a stake into the ground at each post position. Use spray paint to mark the exact spot where your post hole should be centred. This prevents confusion when you're digging and ensures posts line up visually.
Check that your marked positions follow your concrete fence post spacing measurements. Stand back and look along the line, your eye will catch spacing errors that measuring misses.
Clear any vegetation, rocks, or debris from the work area. Remove turf if necessary. A clean work area prevents tripping hazards and makes digging easier.
Digging Post Holes to the Correct Depth
Dig straight down to your planned concrete fence post depth. Most holes need to be slightly wider than the post itself, about 5-10cm wider all around gives you room to work.
Use a spade or shovel to excavate. For multiple posts, this is physically demanding work. Take breaks if needed. Proper technique protects your back: bend your knees, not your waist.
Remove spoil as you dig. A wheelbarrow makes this easier than carrying buckets. Stack the soil nearby, you may need it to backfill around the post.
Check the bottom of the hole is firm and level. Soft ground at the base won't support the post properly. If you hit water, the hole is too deep for your soil type, adjust your concrete fence post depth accordingly.
Compact the base with the back of your spade. Some installers add a 5cm layer of gravel or hardcore for drainage. This prevents water pooling under the post.
Setting Posts and Mixing the Concrete
Place your concrete post in the hole. Use a spirit level to check it's perfectly vertical. Adjust the post position until it's true in both directions.
Have a helper hold the post steady while you mix the concrete. Quick Dry Postcrete requires approximately 3 litres of water per bag. Mix it in a bucket until you reach a thick, porridge-like consistency.

Pour the concrete around the base of the post. Work it around all sides so it fills gaps completely. Tap the post gently with a rubber mallet as you pour, this helps the concrete settle and removes air pockets.
The concrete will initially harden within 15 minutes, allowing you to move to the next post. However, full curing takes longer. Do not apply load to the post or install fence panels until the concrete has fully set.
How Long for Post-Setting Concrete to Cure
Quick Dry Postcrete hardens quickly, but full strength takes time. Initial set happens within 15 minutes, which is why this product suits multiple installations in one day.
Full curing typically requires 24-48 hours before you can safely hang fence panels. Weather affects this timeline. Cold temperatures slow curing. Wet conditions can extend the process.
During the curing period, do not disturb the posts. Wind can move them slightly if they're not fully set. Rain won't harm the concrete, but extreme weather may delay full curing.
Some installers prefer to wait a full week before hanging heavy panels, especially in cold weather. This ensures maximum strength. For lighter panels or mild conditions, 48 hours usually suffices.
Mark the installation date on each post or keep notes. This helps you track when it's safe to proceed with panel installation.
Common Installation Mistakes to Avoid
Concrete fence post installation problems can stem from rushing or skipping steps. Learn from others' errors.
Insufficient depth is the most common mistake. Posts dug too shallow will move in wind and frost. They may lean visibly within the first year. Always respect the one-third rule for concrete fence post depth.
Uneven spacing creates visual problems. Fence panels won't fit properly. Gaps appear between panels and posts. Measure carefully and check twice.
Wet concrete during installation causes structural weakness. Don't install panels until the concrete has fully cured. Impatience leads to sagging fences within months.
Skipping the spirit level results in crooked posts. Even small tilts compound across your fence line. Use the level constantly during installation.
Poor soil preparation undermines everything. Loose, unprepared ground won't grip the post. Compact the base before pouring concrete.
Mixing concrete too thin reduces strength. Concrete should be thick enough to hold its shape. Too much water weakens the final result.
Ignoring ground conditions causes failures. If your soil is sandy, you need deeper holes. Adjust your approach to match what you find.
Safety Tips for Installing Concrete Posts
Fence installation involves physical effort and tools that demand respect. Protect yourself throughout the process.
Wear appropriate protective equipment:
- Safety glasses when mixing concrete and digging
- Rubber gloves when handling concrete
- Steel-toed boots to protect your feet
- Long trousers to protect your legs from sharp edges
Lift properly when handling concrete posts and bags. They're heavy. Bend your knees, keep your back straight, and ask for help with large posts. Lifting injuries can sideline you for weeks.
Check the weather forecast before starting. Heavy rain makes digging harder and delays concrete curing. Strong wind can move wet posts. Frost overnight may require you to delay installation.
Secure the work area if children or pets are nearby. Open holes are hazards. Wet concrete can burn skin. Keep people away until posts are fully set.
Use tools correctly. A spade isn't a crowbar. A hammer isn't a measuring tool. Misusing tools causes injuries and damage.
Stay hydrated during physical work. Take regular breaks. Fatigue leads to mistakes and injuries.
Call before you dig. Check if underground utilities run through your garden. Contact your local utility companies before breaking ground. This prevents electrocution or gas leaks.
Installing concrete posts in your garden creates a durable foundation for fencing that lasts decades. The process demands care at every step, but the result is worth the effort.
Concrete Fence Posts supplies high-quality posts and the Quick Dry Postcrete you need for reliable installation. Our team offers expert guidance throughout your project. Whether you're a homeowner tackling your first fence or a landscaper managing multiple installations, we provide the materials and support to get the job done right. Contact us for advice on post selection and installation, we're here to help your project succeed.
Frequently Asked Questions
How deep should a concrete fence post be set in the ground?
Concrete fence posts should typically be set 60-75 centimetres deep, depending on your fence height and soil conditions. For a standard 180 centimetre fence panel, aim for the deeper end of this range. Heavier or taller panels may require posts set even deeper to ensure stability and prevent wind movement. Always check your specific panel manufacturer's recommendations, as requirements can vary.
How far apart should concrete fence posts be spaced?
Concrete fence posts are usually spaced 180 centimetres apart (centre to centre) to accommodate standard fence panels of the same width. This spacing ensures panels fit securely between posts without gaps or overlap. If you're using non-standard panel widths, measure carefully and adjust spacing accordingly. Uneven spacing can cause panels to sit at angles and create weak points in your fence line.
How long does post-setting concrete take to cure before I can attach fence panels?
Quick Dry Postcrete typically hardens enough for initial handling within 15 minutes, but you should wait at least 24 hours before attaching fence panels or applying significant load to the posts. Full curing can take several days depending on temperature and moisture conditions. In cold or damp weather, allow extra time. Always check the product instructions on your specific concrete mix, as curing times vary.
What tools do I need to install concrete fence posts in my garden?
Essential tools include a spade or post hole auger for digging, a spirit level to keep posts vertical, a tape measure for spacing and depth, a bucket for mixing concrete, a mixing stick or drill with paddle attachment, and work gloves. A rubber mallet helps tap posts into position without damage. A string line between corner posts helps maintain straight fence lines. Having a helper makes the job easier, particularly when holding posts upright while concrete sets.